From PWA Creator v3.1.0, we’ve introduced the PWA Custom Install Android Popup section where you can manage the PWA Custom Install Android popup details.

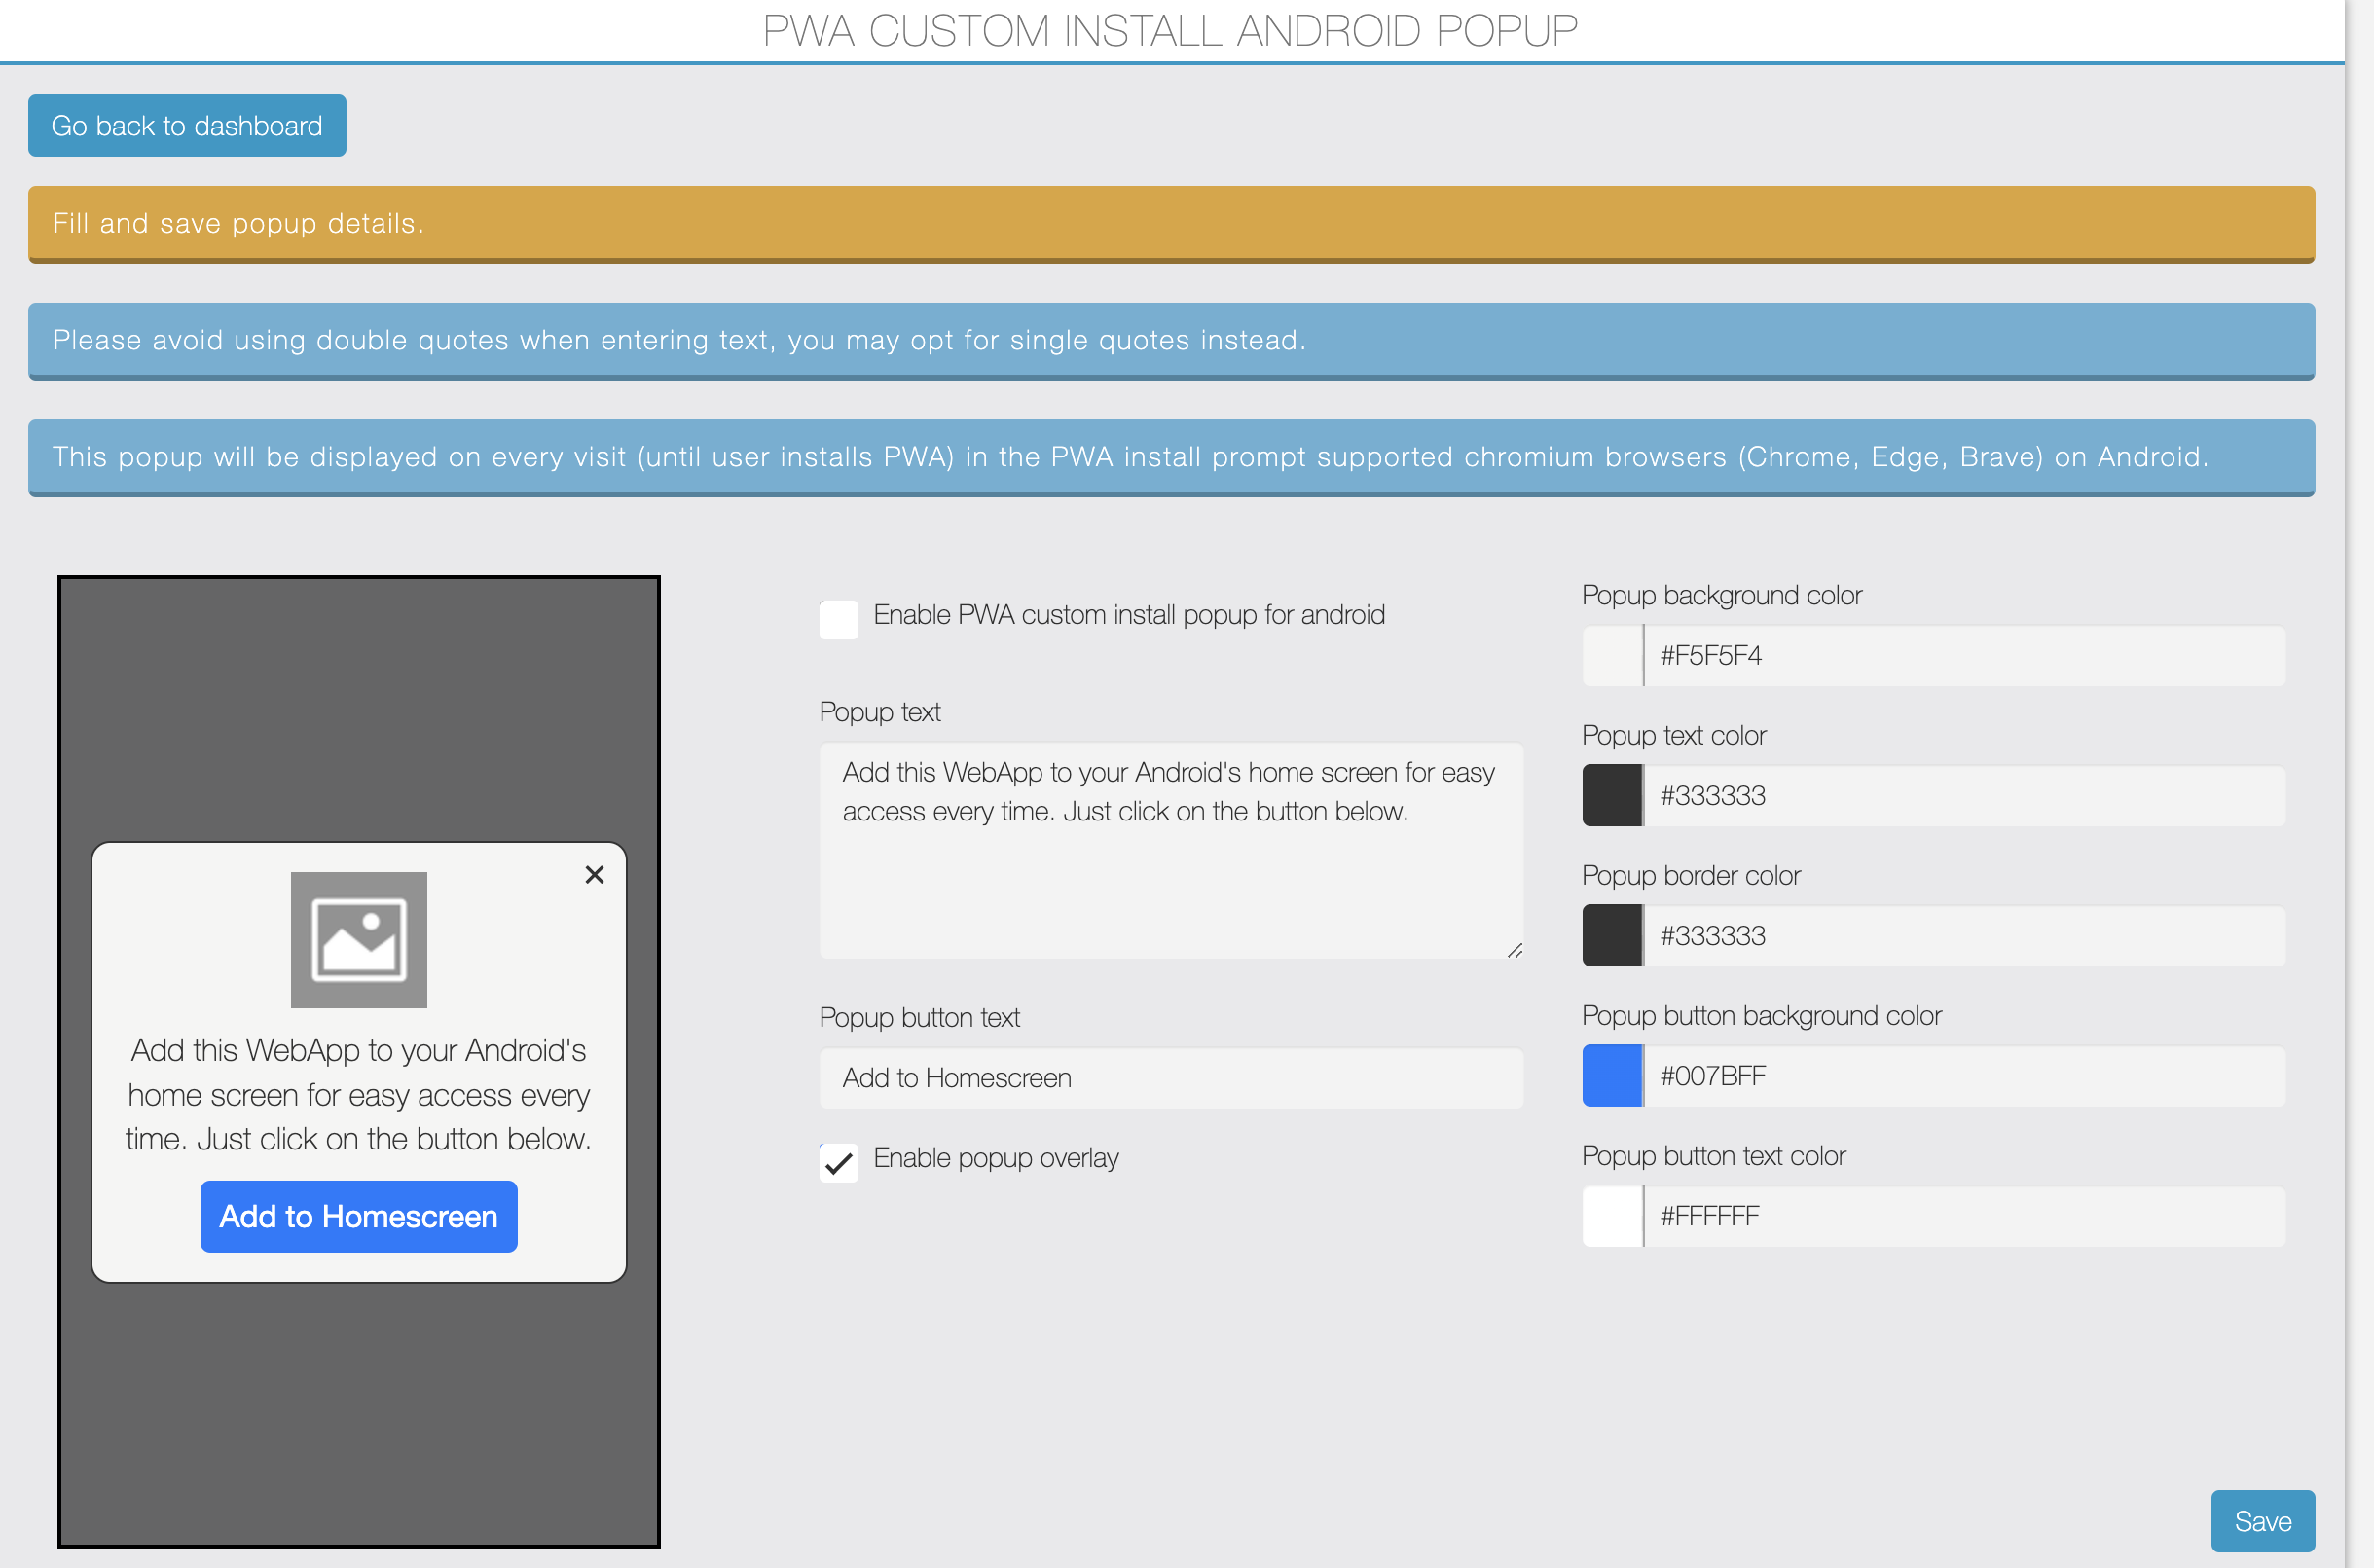
Click on the “Click here to manage custom install android popup” button, and the screen below will be displayed.

You can enable this popup by checking the checkbox.
You can customize and manage popup text, button text, enable popup overlay, popup background color, text color, border color, button text color, button background color, etc., using the above form.
This popup will be displayed on every visit until the user installs the PWA on Android Chromium browsers that support the PWA install prompt like Chrome, Edge, Brave.
Note: If your PWA was published before this section was introduced, you must regenerate your PWA after filling in the above details.
This new section is dynamic, meaning once you regenerate the PWA after filling in the above details, any changes made to the options in the form will take effect in your PWA without needing to regenerate it.
Why this popup?
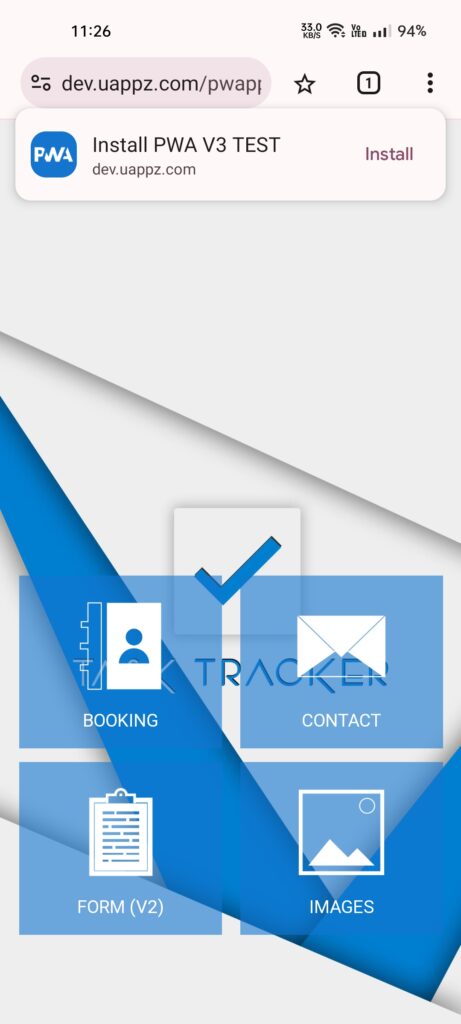
These days, in Android browsers like Chrome and Edge, default PWA install prompt is shown only on the first visit (as shown in the image below) and does not appear later.

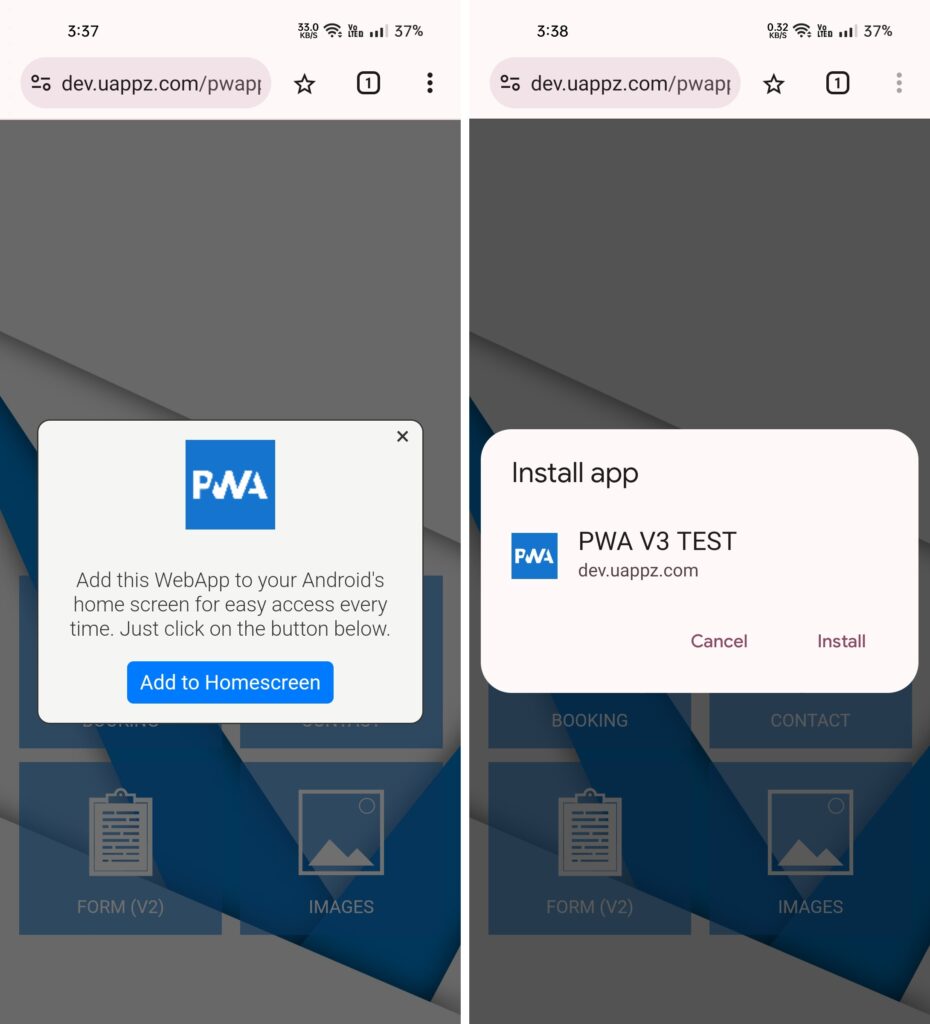
So, this new popup will be displayed in the middle of the screen on every visit until the user installs the PWA. Using this popup, users can know that your web app can be installed.
PWA Screenshot: If this popup is enabled, it will be displayed in the middle center in the pwa install prompt supported android chromium browsers, and clicking the add button will trigger the browser’s PWA install prompt.

Hint: This popup will be displayed in the browser only; it won’t be displayed in the installed PWA. So, if you have enabled other popups like cookie consent popup, push prompt, etc., there may be three popups in your PWA. You can choose to display the push prompt in Android standalone mode or after some delay, so users won’t get bored with three popups.
If you’ve enabled this custom install android popup, then a link of PWA Richer Install UI section will be displayed as shown in the image below. If you want to use richer install ui, you can click on it and fill details there otherwise its totally optional.

