Siberian PWA Creator Editor Module allows your users to create PWA themselves.
You can access the PWA Creator Editor Module by visiting: Siberian Editor > Left Side Menu > Modules > PWA Creator
By Default, Users will see a screen like below if PWA isn’t activated for a particular app.

If you have enabled the PWA creator module access for this app/user then below self-activation screen will be shown. You can enable the PWA creator module access for a specific app, for a specific user and for all users from the PWA BackOffice module.

After the PWA self-activation, PWA details section will be displayed.

Click on the button “Manage PWA Details” to fill and save your PWA details.
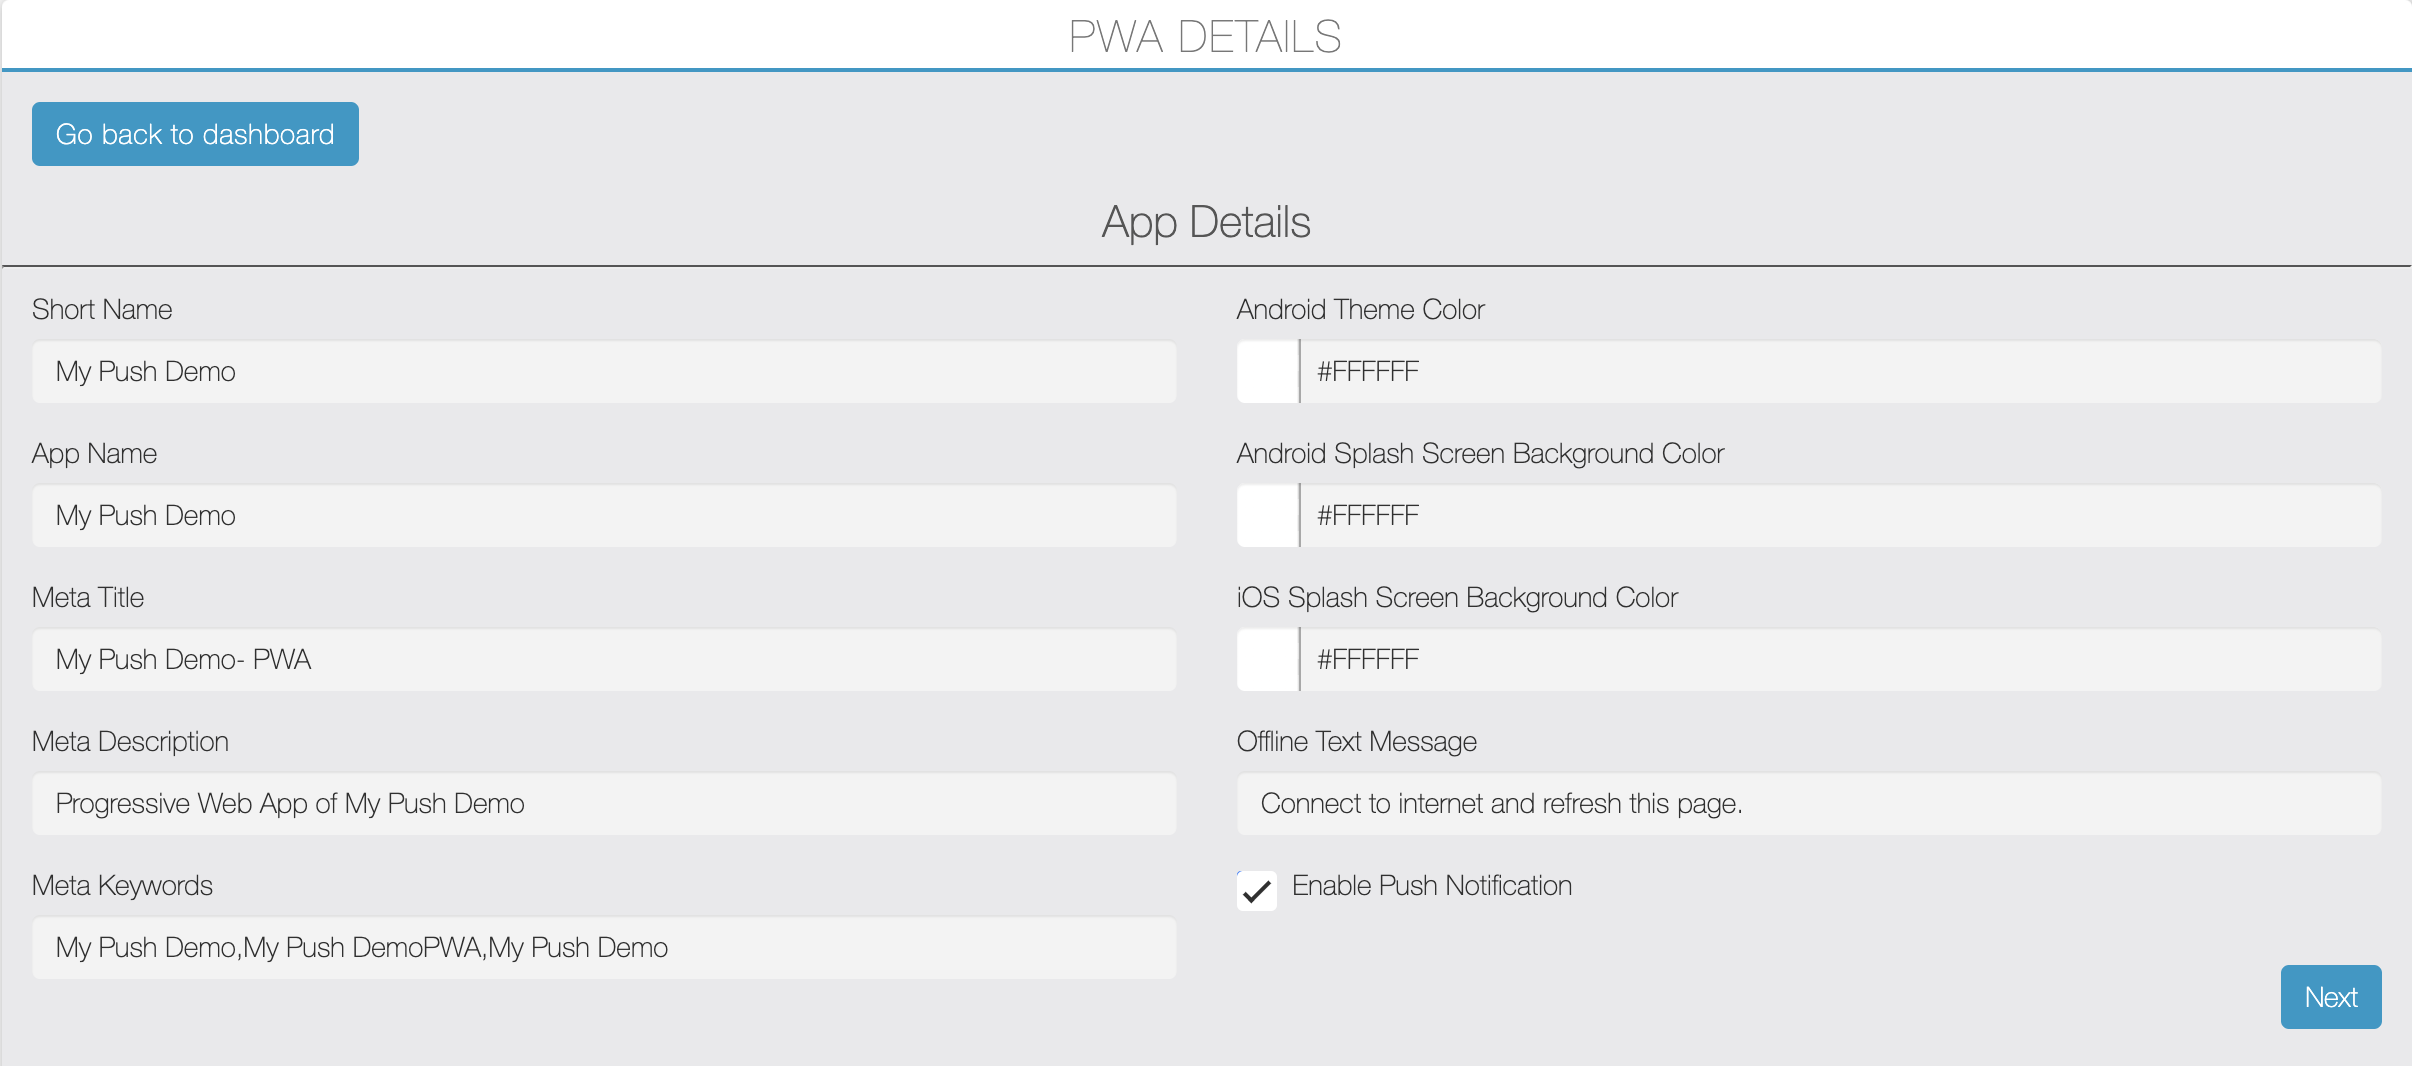
Here your user has to fill app details like app short name, app name, meta title/description/keywords, color scheme, offline message etc. Read more about PWA Manifest here.
User can check-mark the “Enable Push Notification” option to enable PWA Push Notification.
On click of the “Next” button, iPhone install pop-up configuration screen will be displayed.
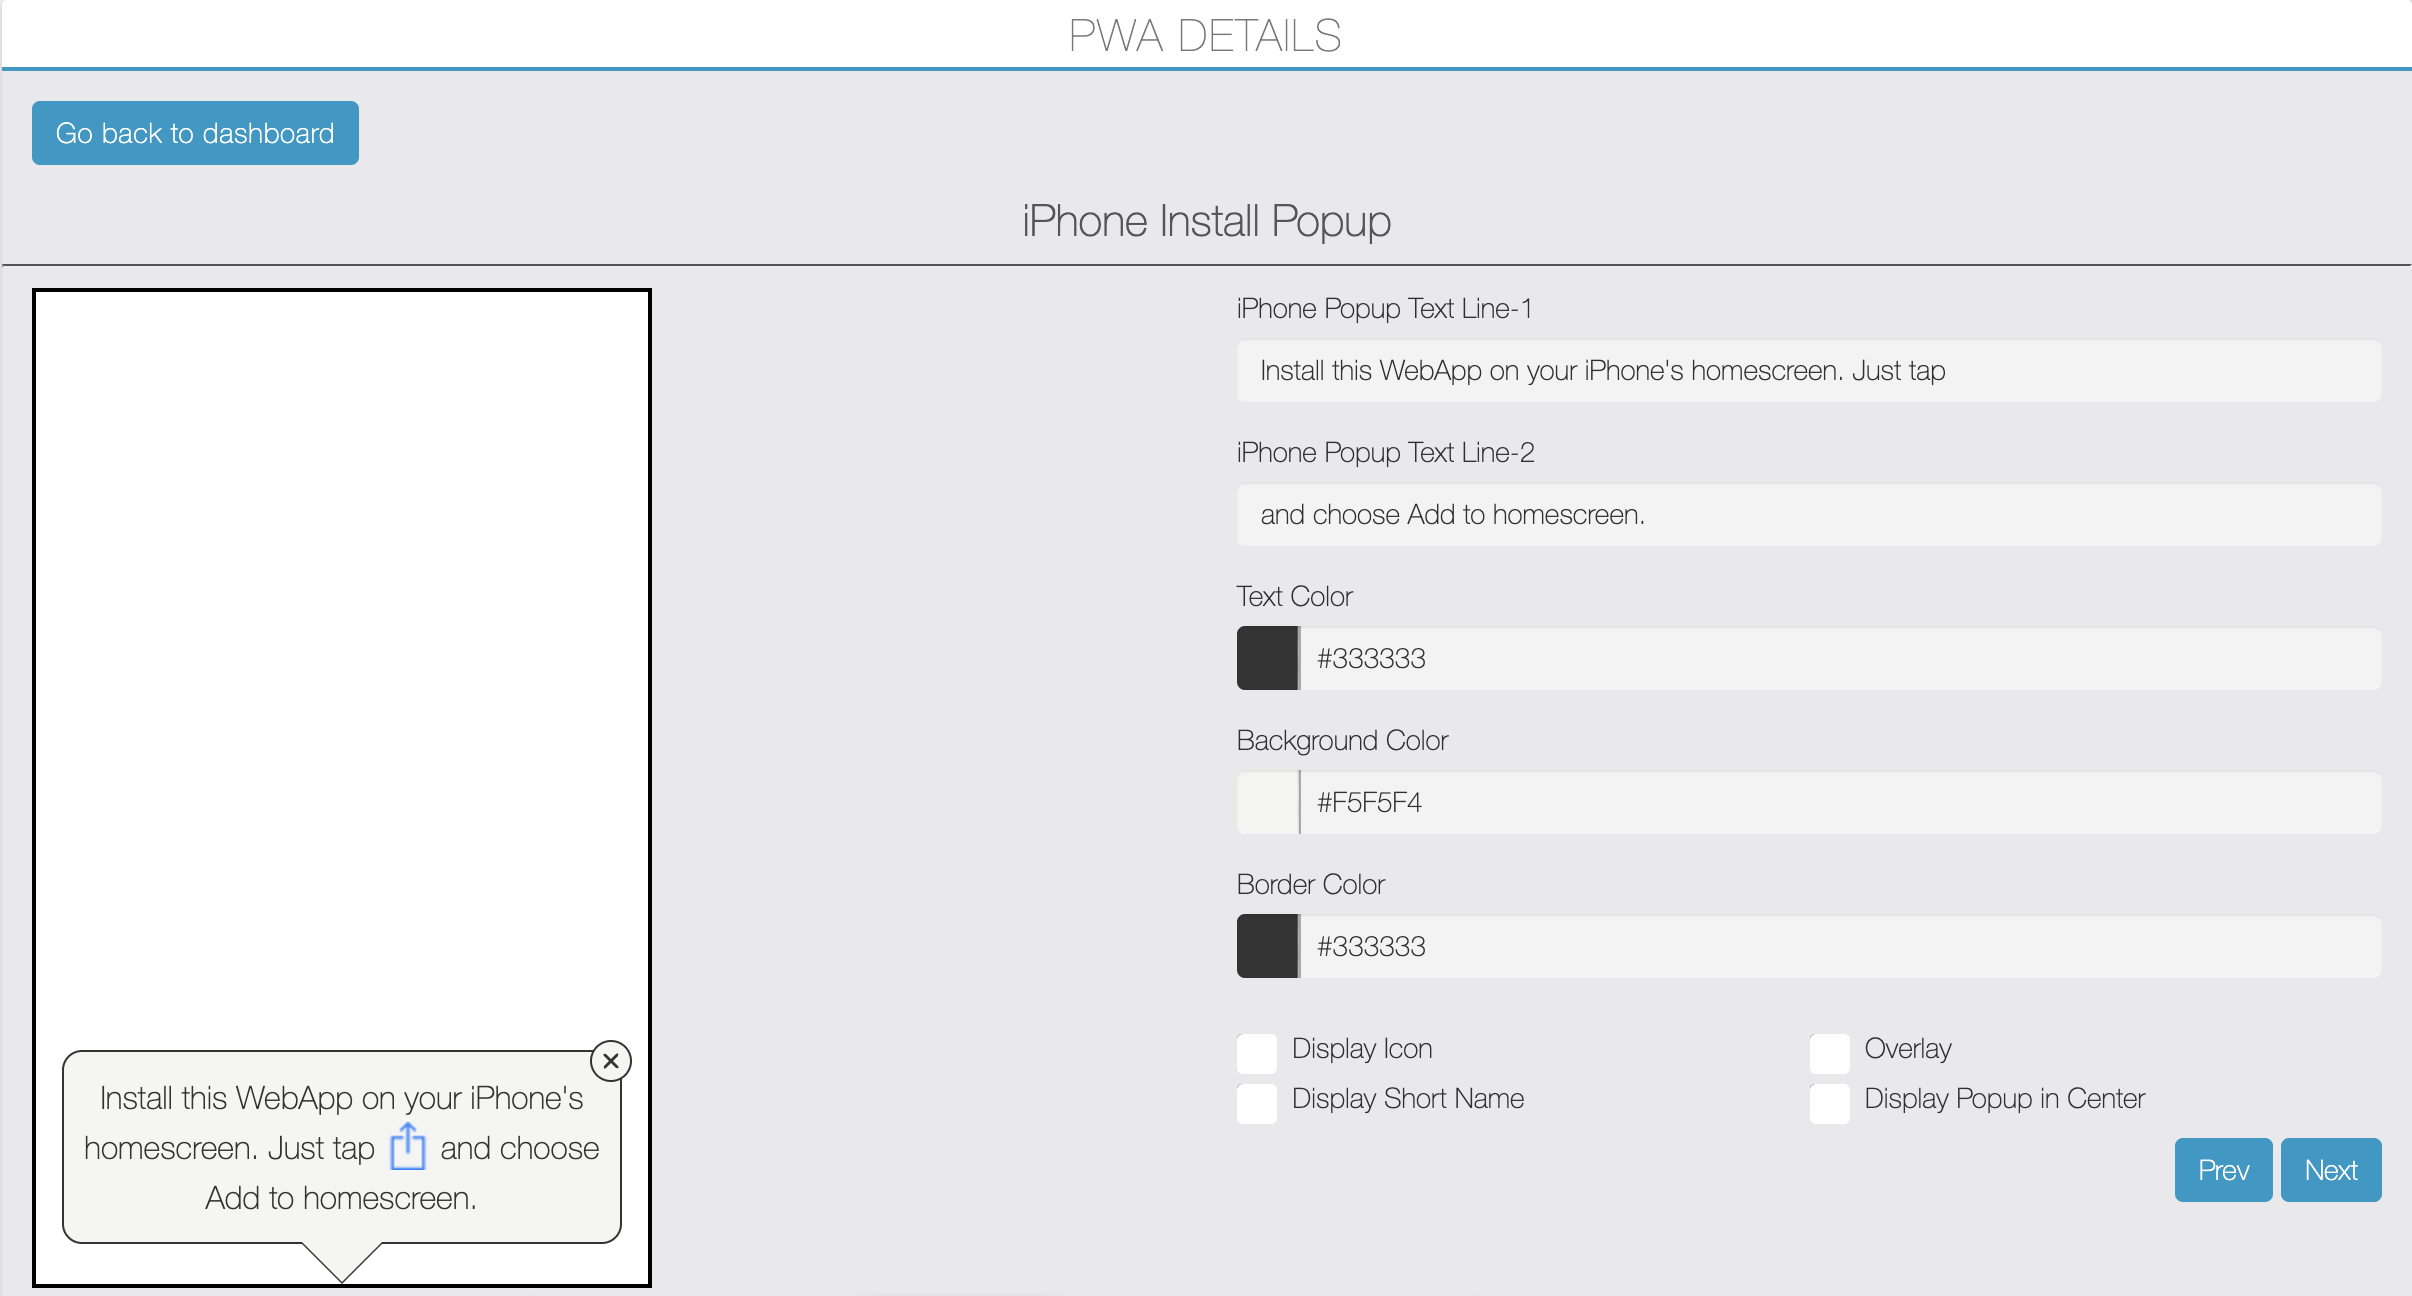
Here default text will be pre-filled. iPhone share icon will be auto added between text line-1 & 2. Here user can manage text color, background color and border color. User can customise popup like display popup in center position, black overlay, display app short name & icon etc.
On click of the “Next” button, Facebook PWA pop-up configuration screen will be displayed.
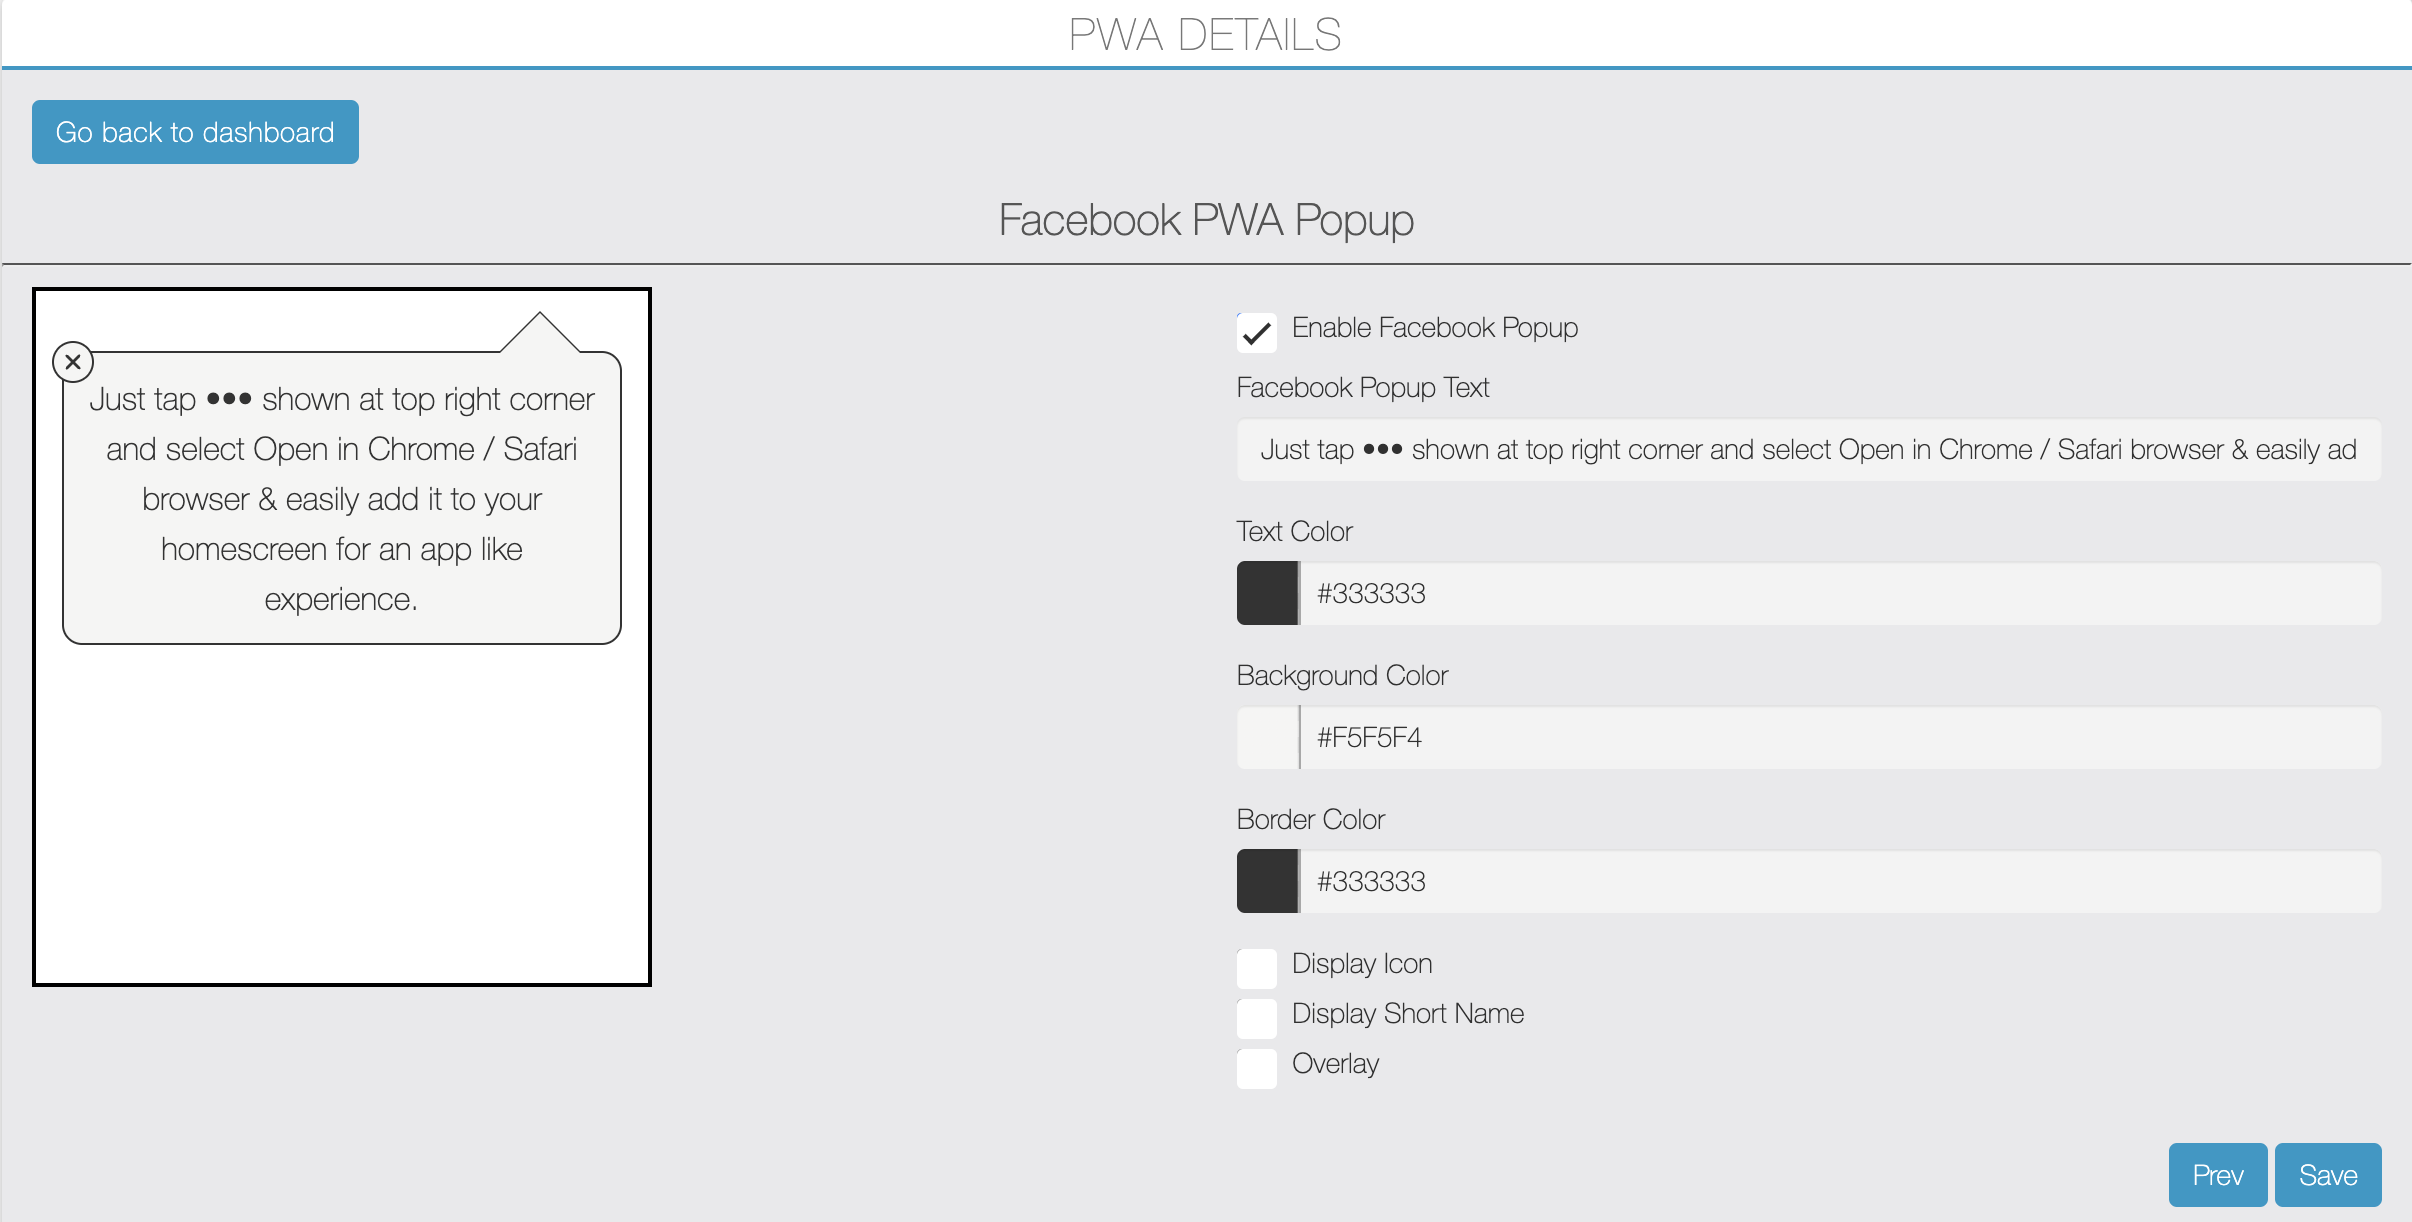
User can enable or disable Facebook PWA Popup by clicking on a checkbox.
Here default text will be pre-filled. User can manage text color, background color and border color. User can customise popup like display app short name & icon, display black overlay etc.
User can see a demo preview of popup configuration on the left side panel.
Click on the “Save” button to save all details and then click on the “Go back to dashboard” button.
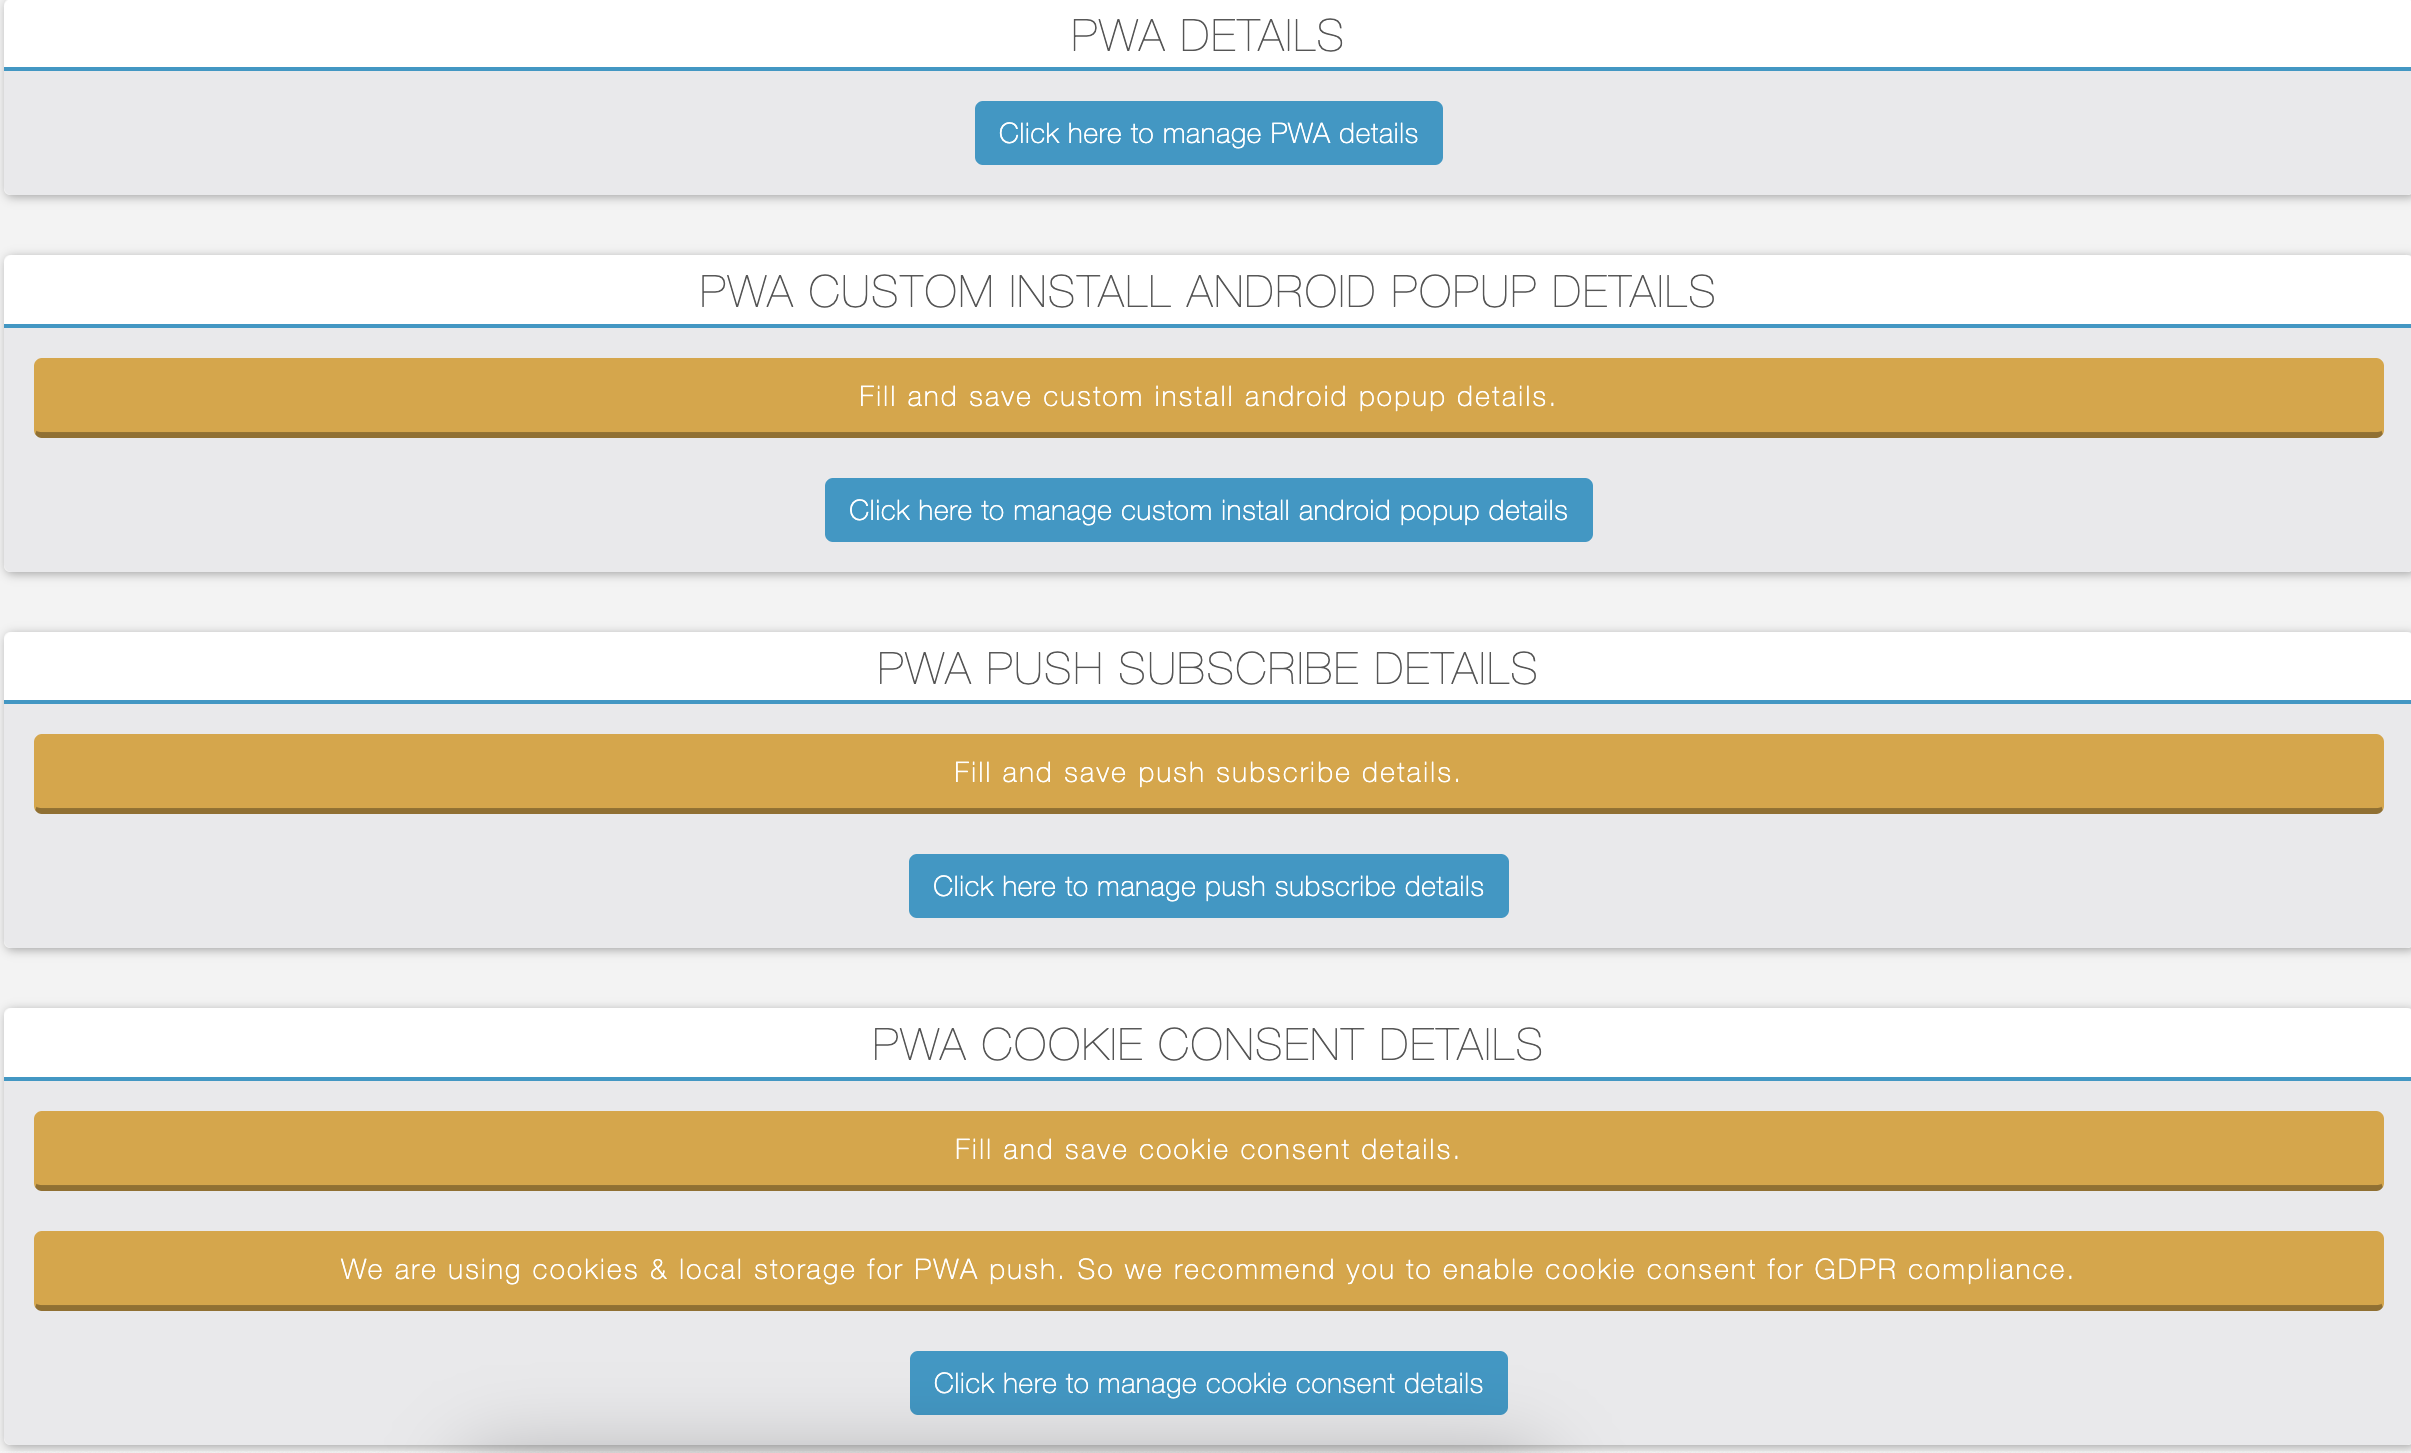
Click on the “Manage Custom Install Android Popup” button to configure your custom install android popup. You can find more info about it here.
If you’ve enabled the PWA push notifications, “PWA Push Subscribe Details” & “PWA Cookie Consent Details“section will be displayed there.
Click on the “Manage Push Subscribe Details” button to configure your push subscribe prompt and success message. You can find more info about it here.
Click on the “Manage Cookie Consent Details” button to configure your cookie consent popup. You can find more info about it here.
After that or If you haven’t enabled the push, then below “Generate & Publish PWA” section will be displayed there.

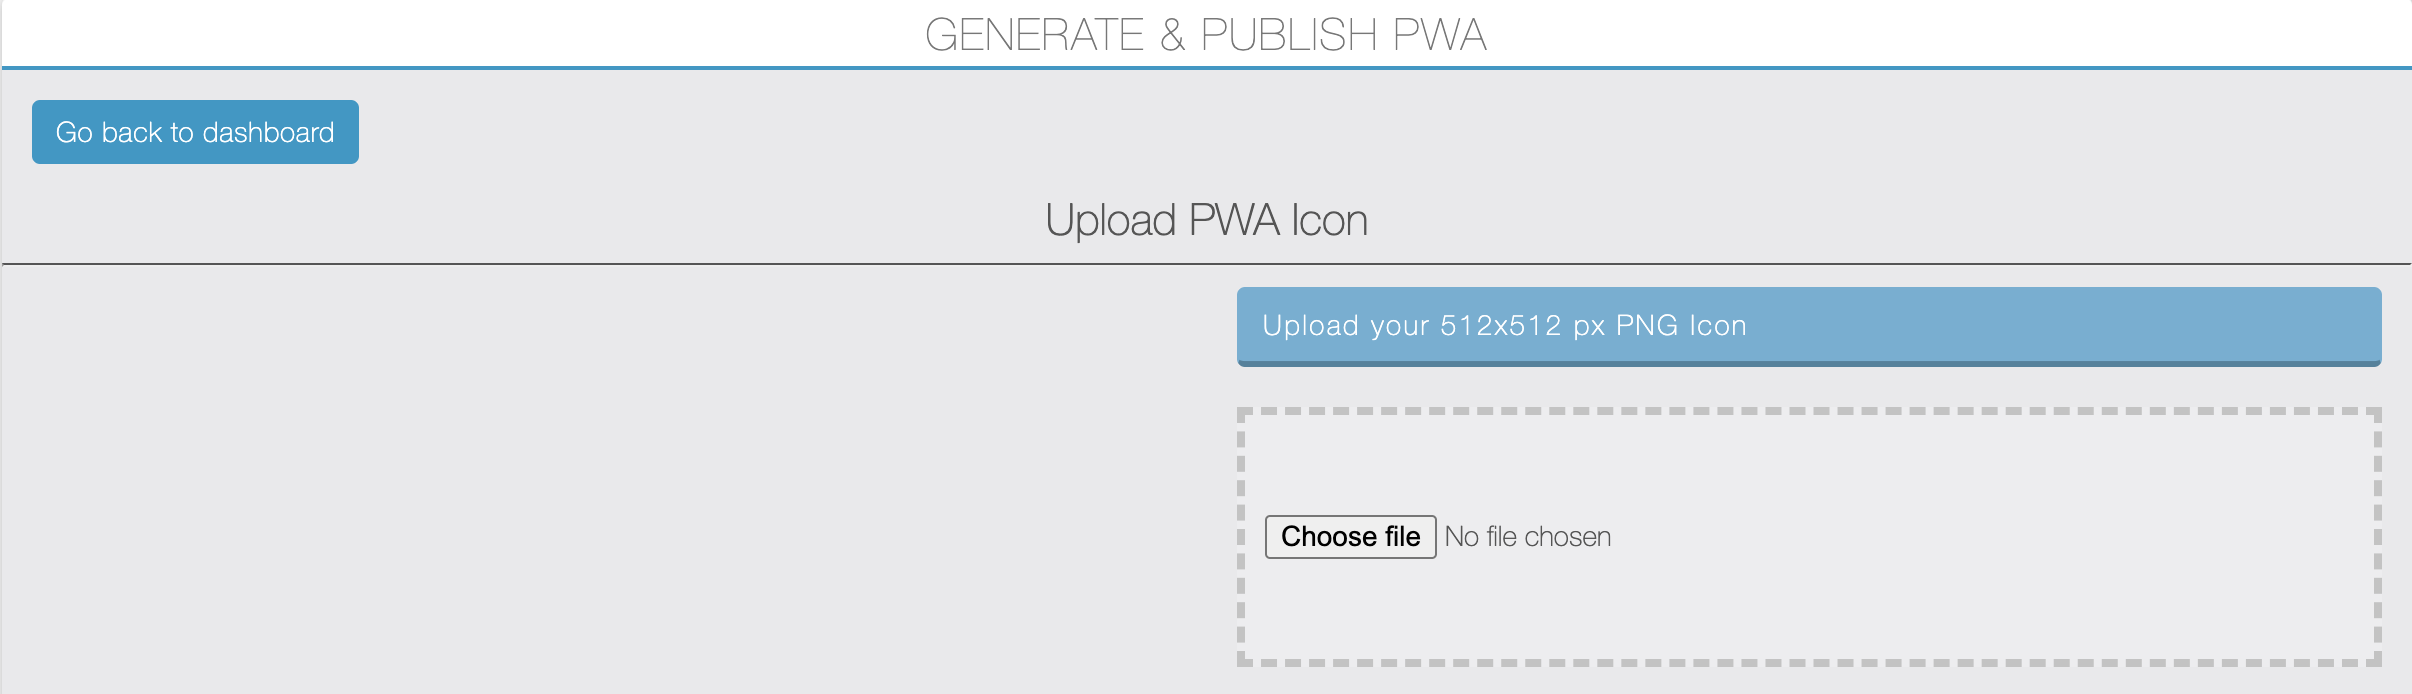
Click on the “Generate & Publish PWA” button, below screen will be displayed there.
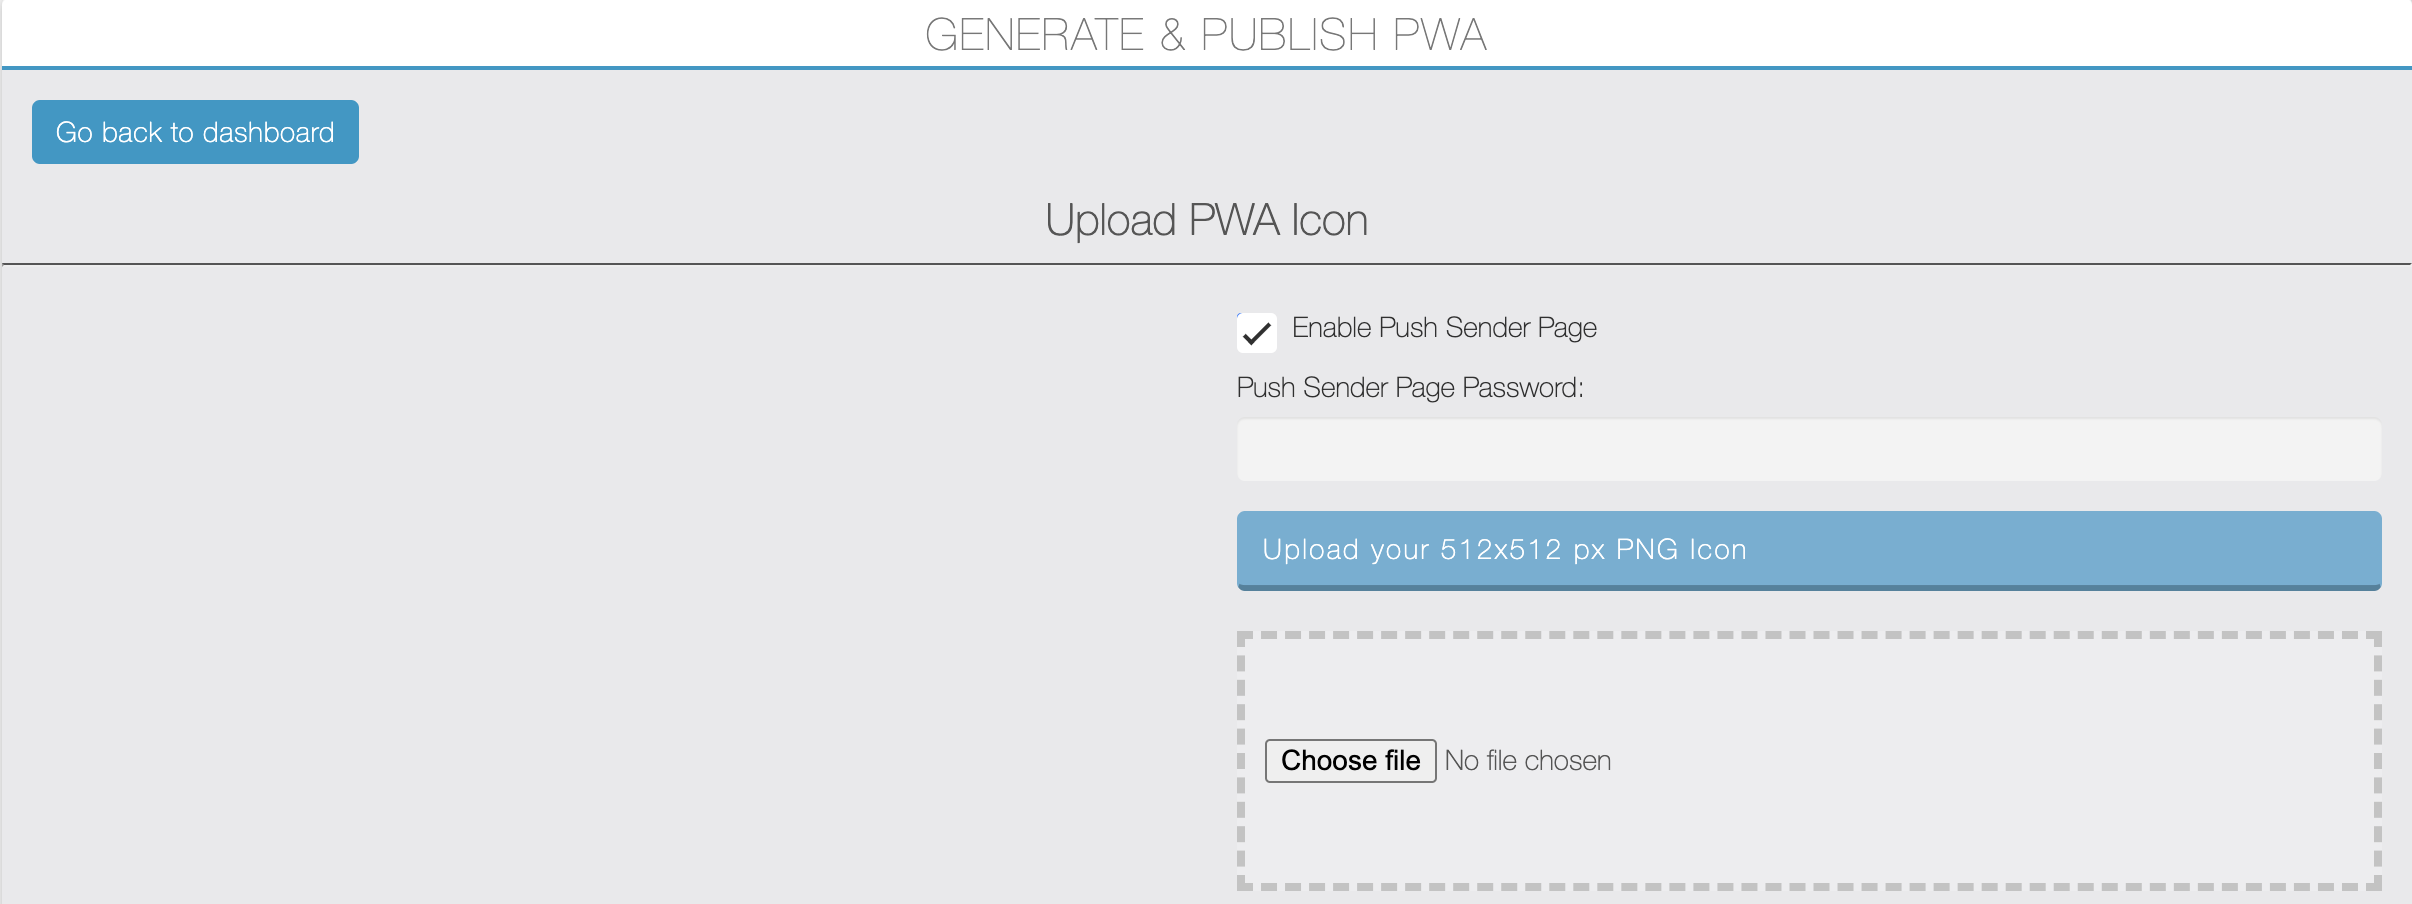
Note: If you’ve enabled external push sender from the Pwa Push backoffice module then option to enable external push sender will be displayed as shown in the image below. You can enable it and set password there.
Now upload your PWA icon (512*512px) in PNG format. Then after a screen like below will be displayed.
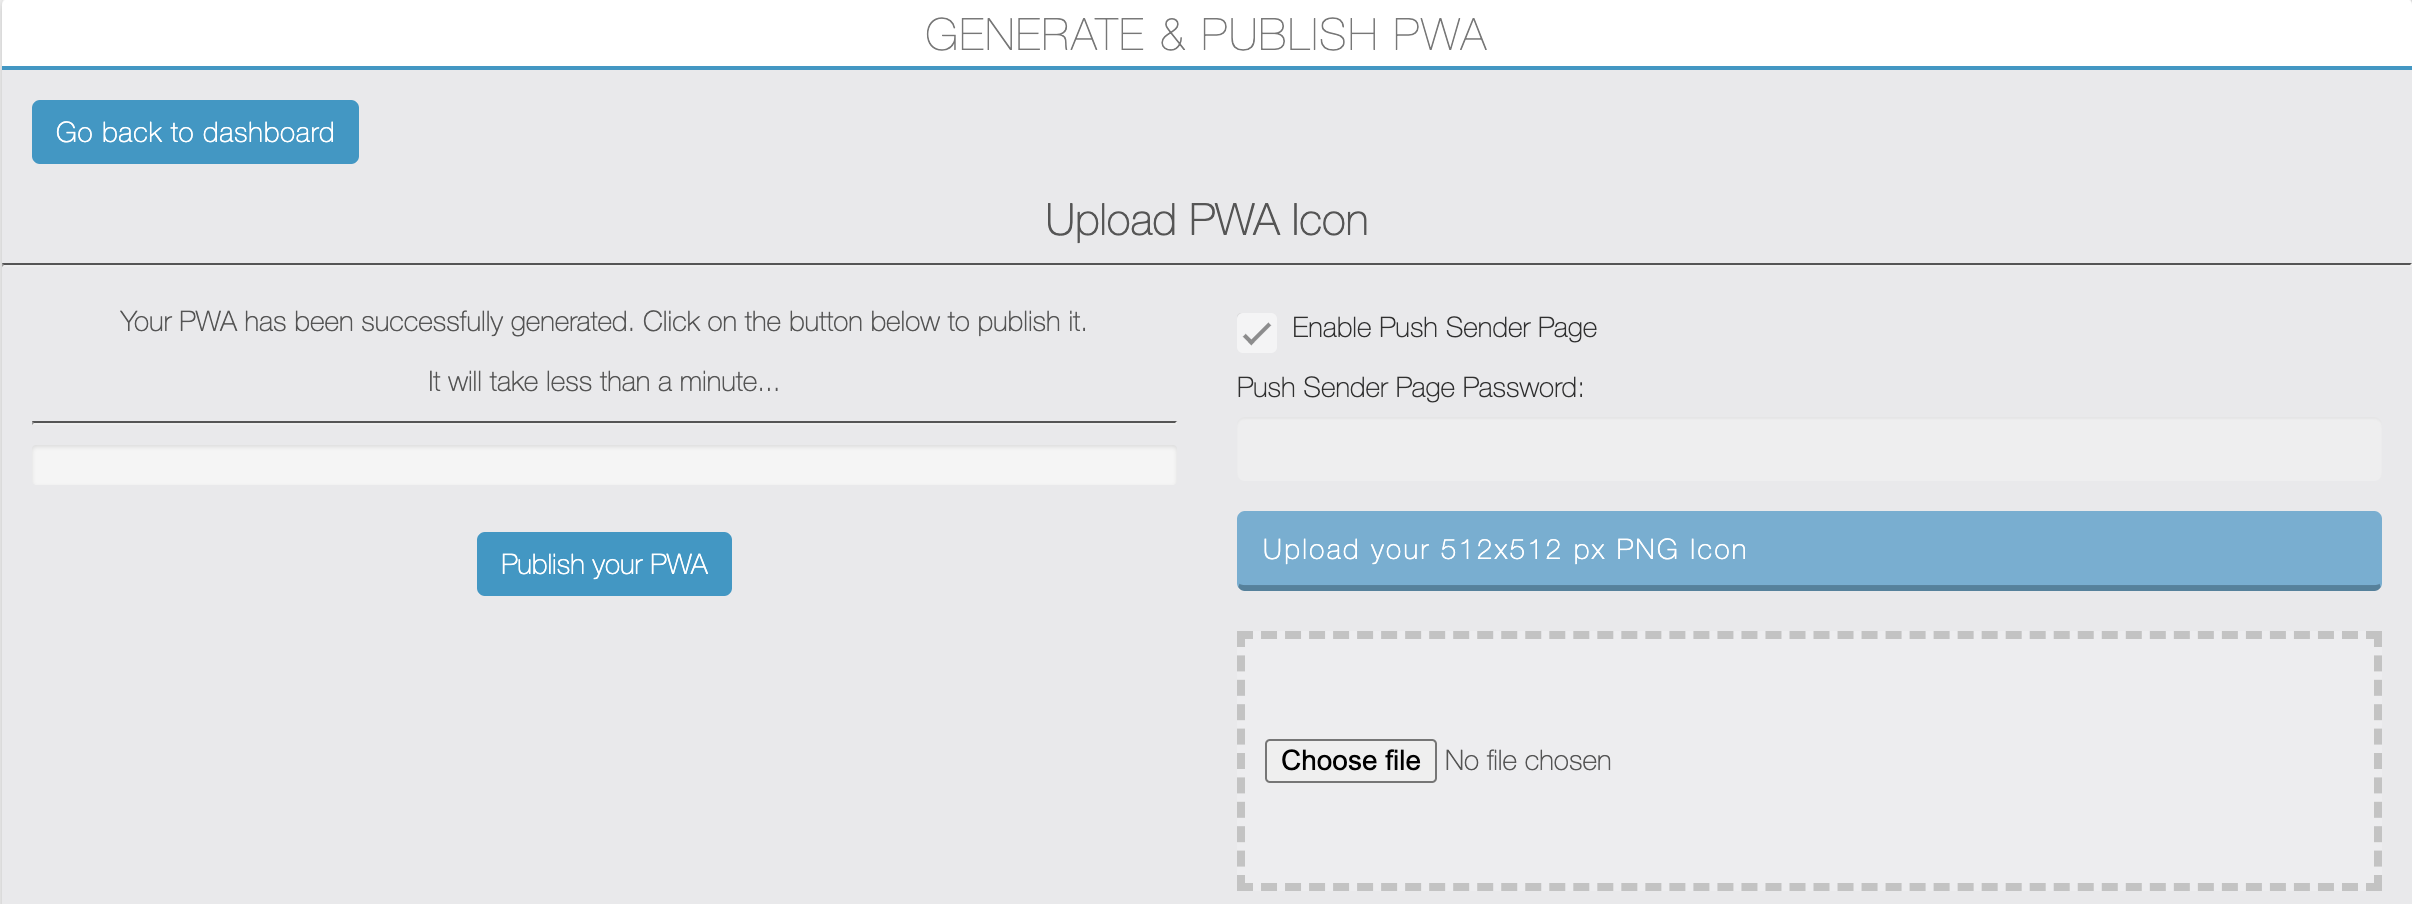
Click on the button “Publish your PWA“. After that screen like below will be displayed for a second and then after it will auto-redirect to the main dashboard page.
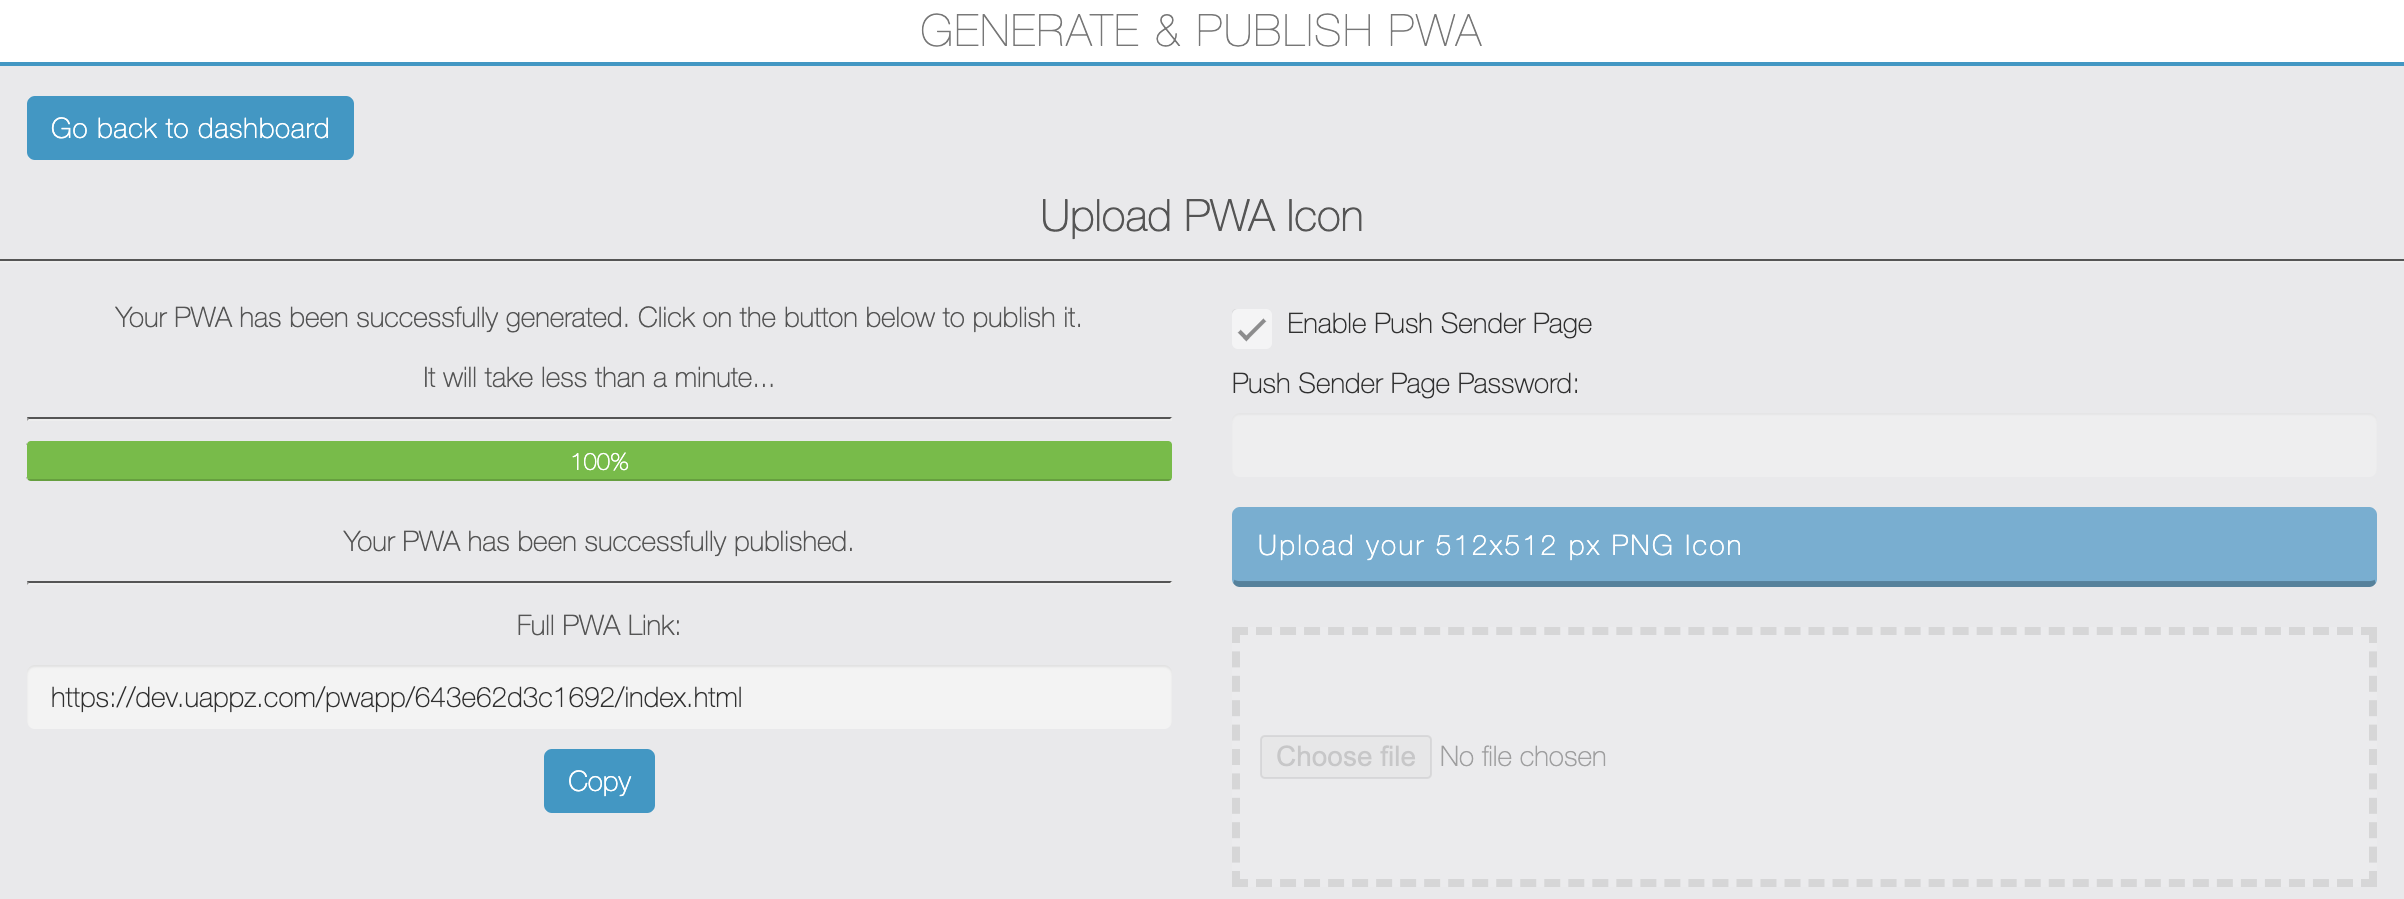
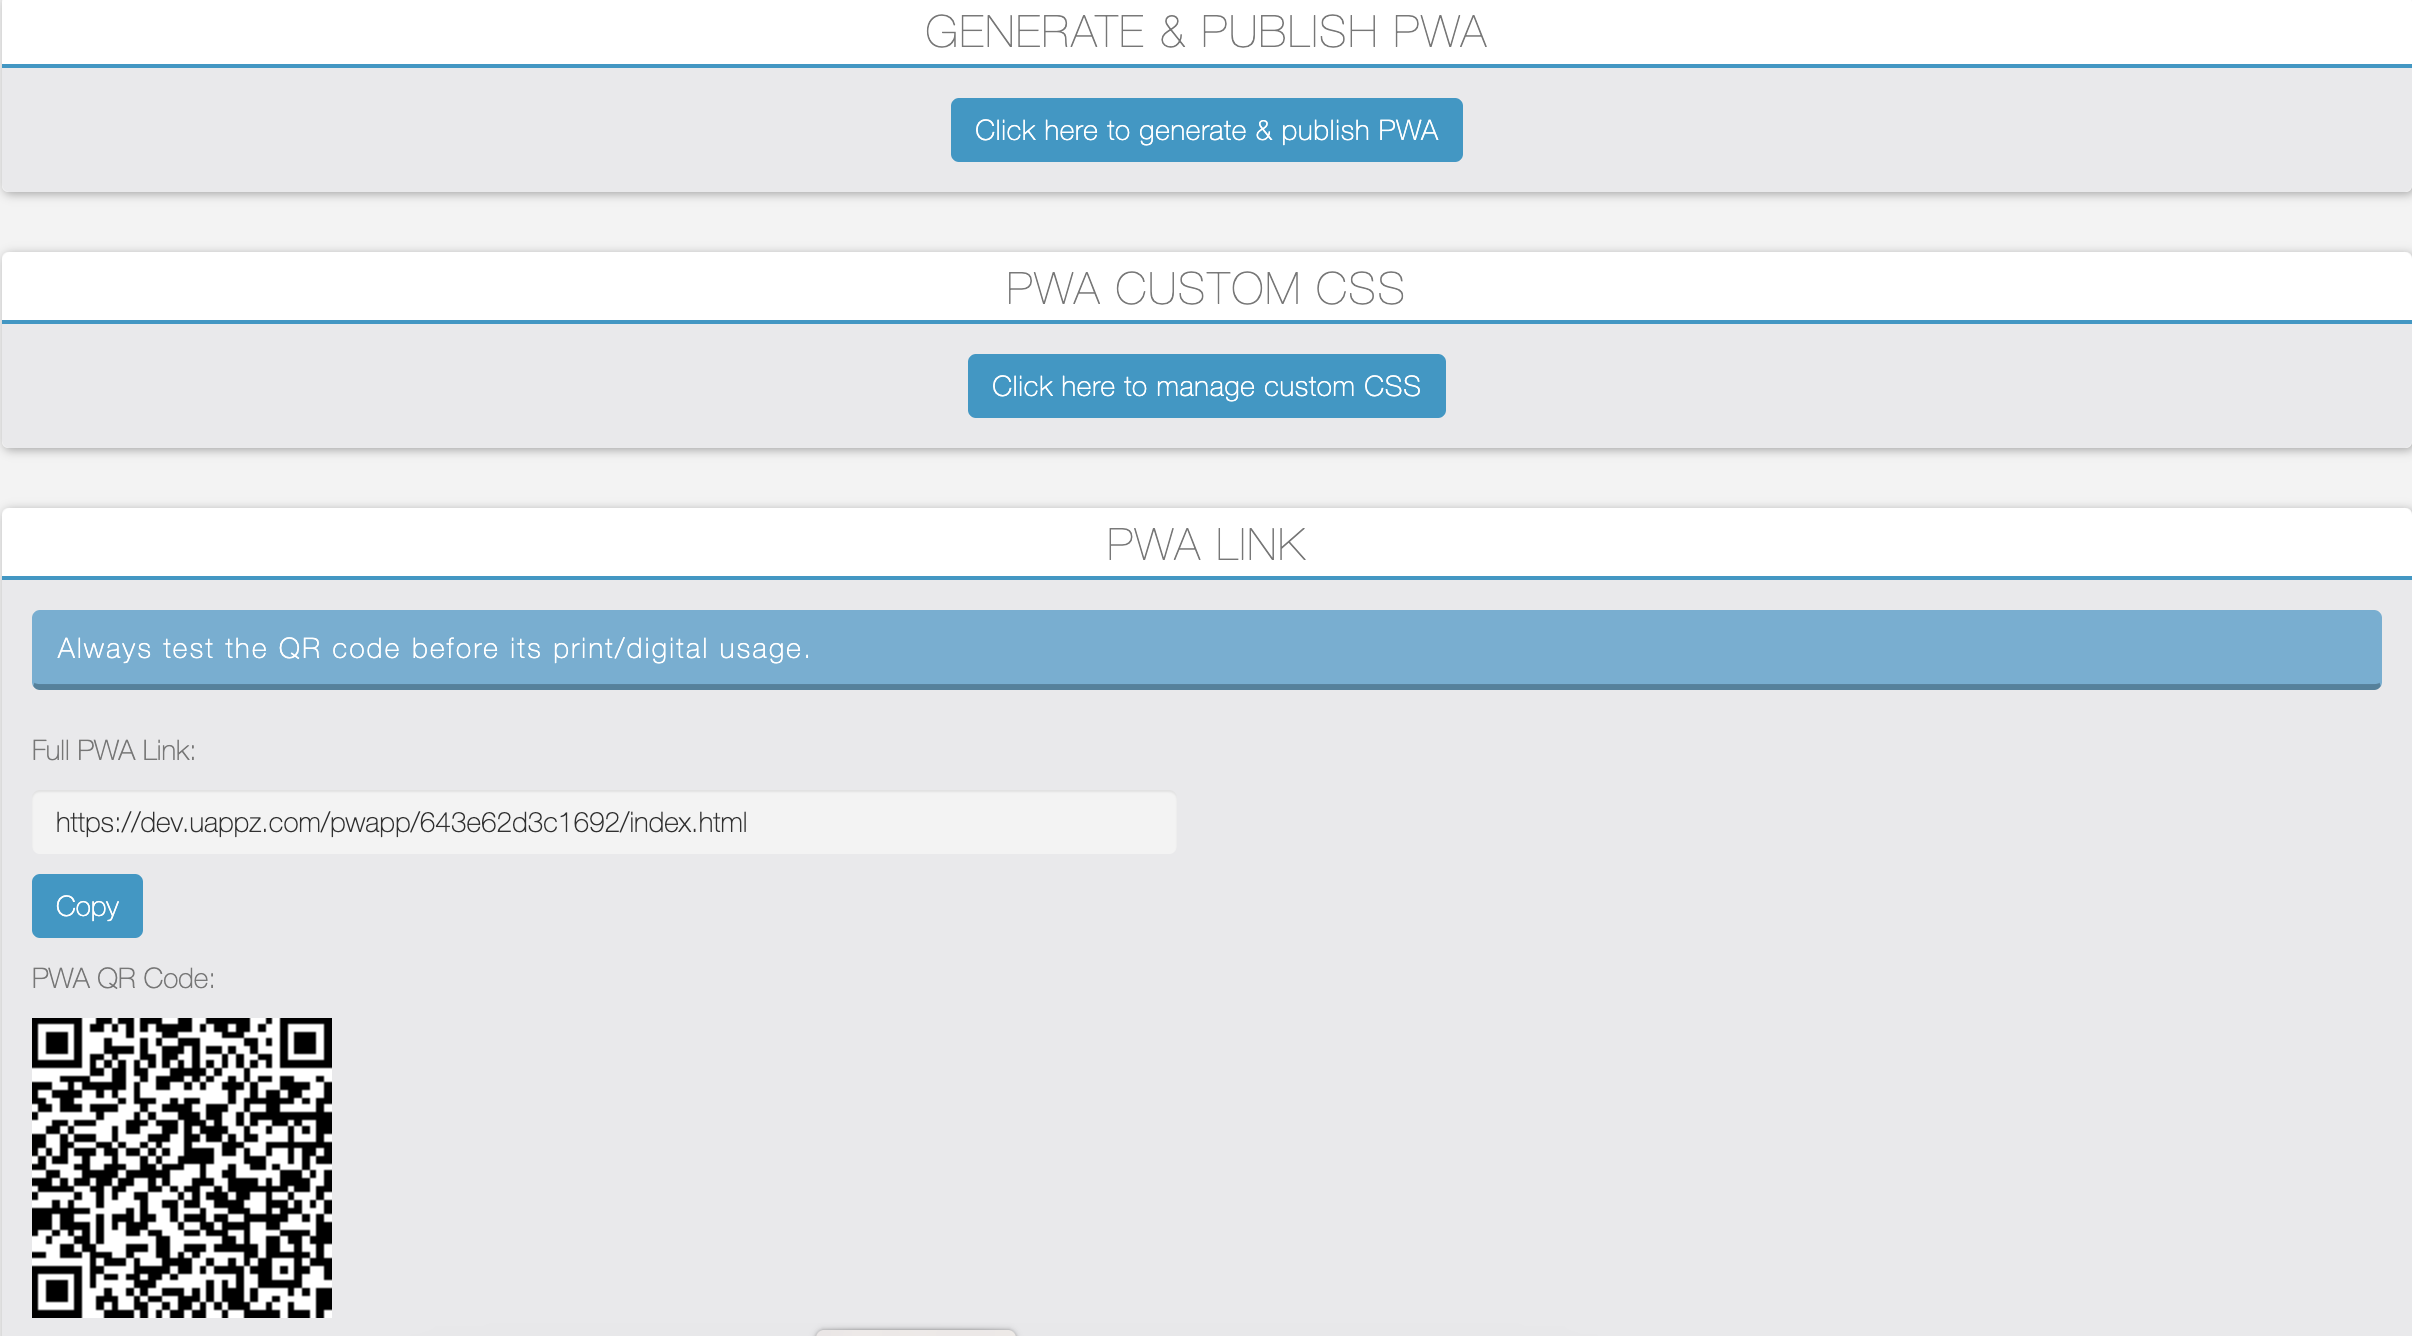
Now your default PWA link with QR code will be displayed. If you have added a custom domain for PWA then it will be also displayed here.
By clicking on the button “Manage custom CSS“, a new page will be displayed as shown in the image below.
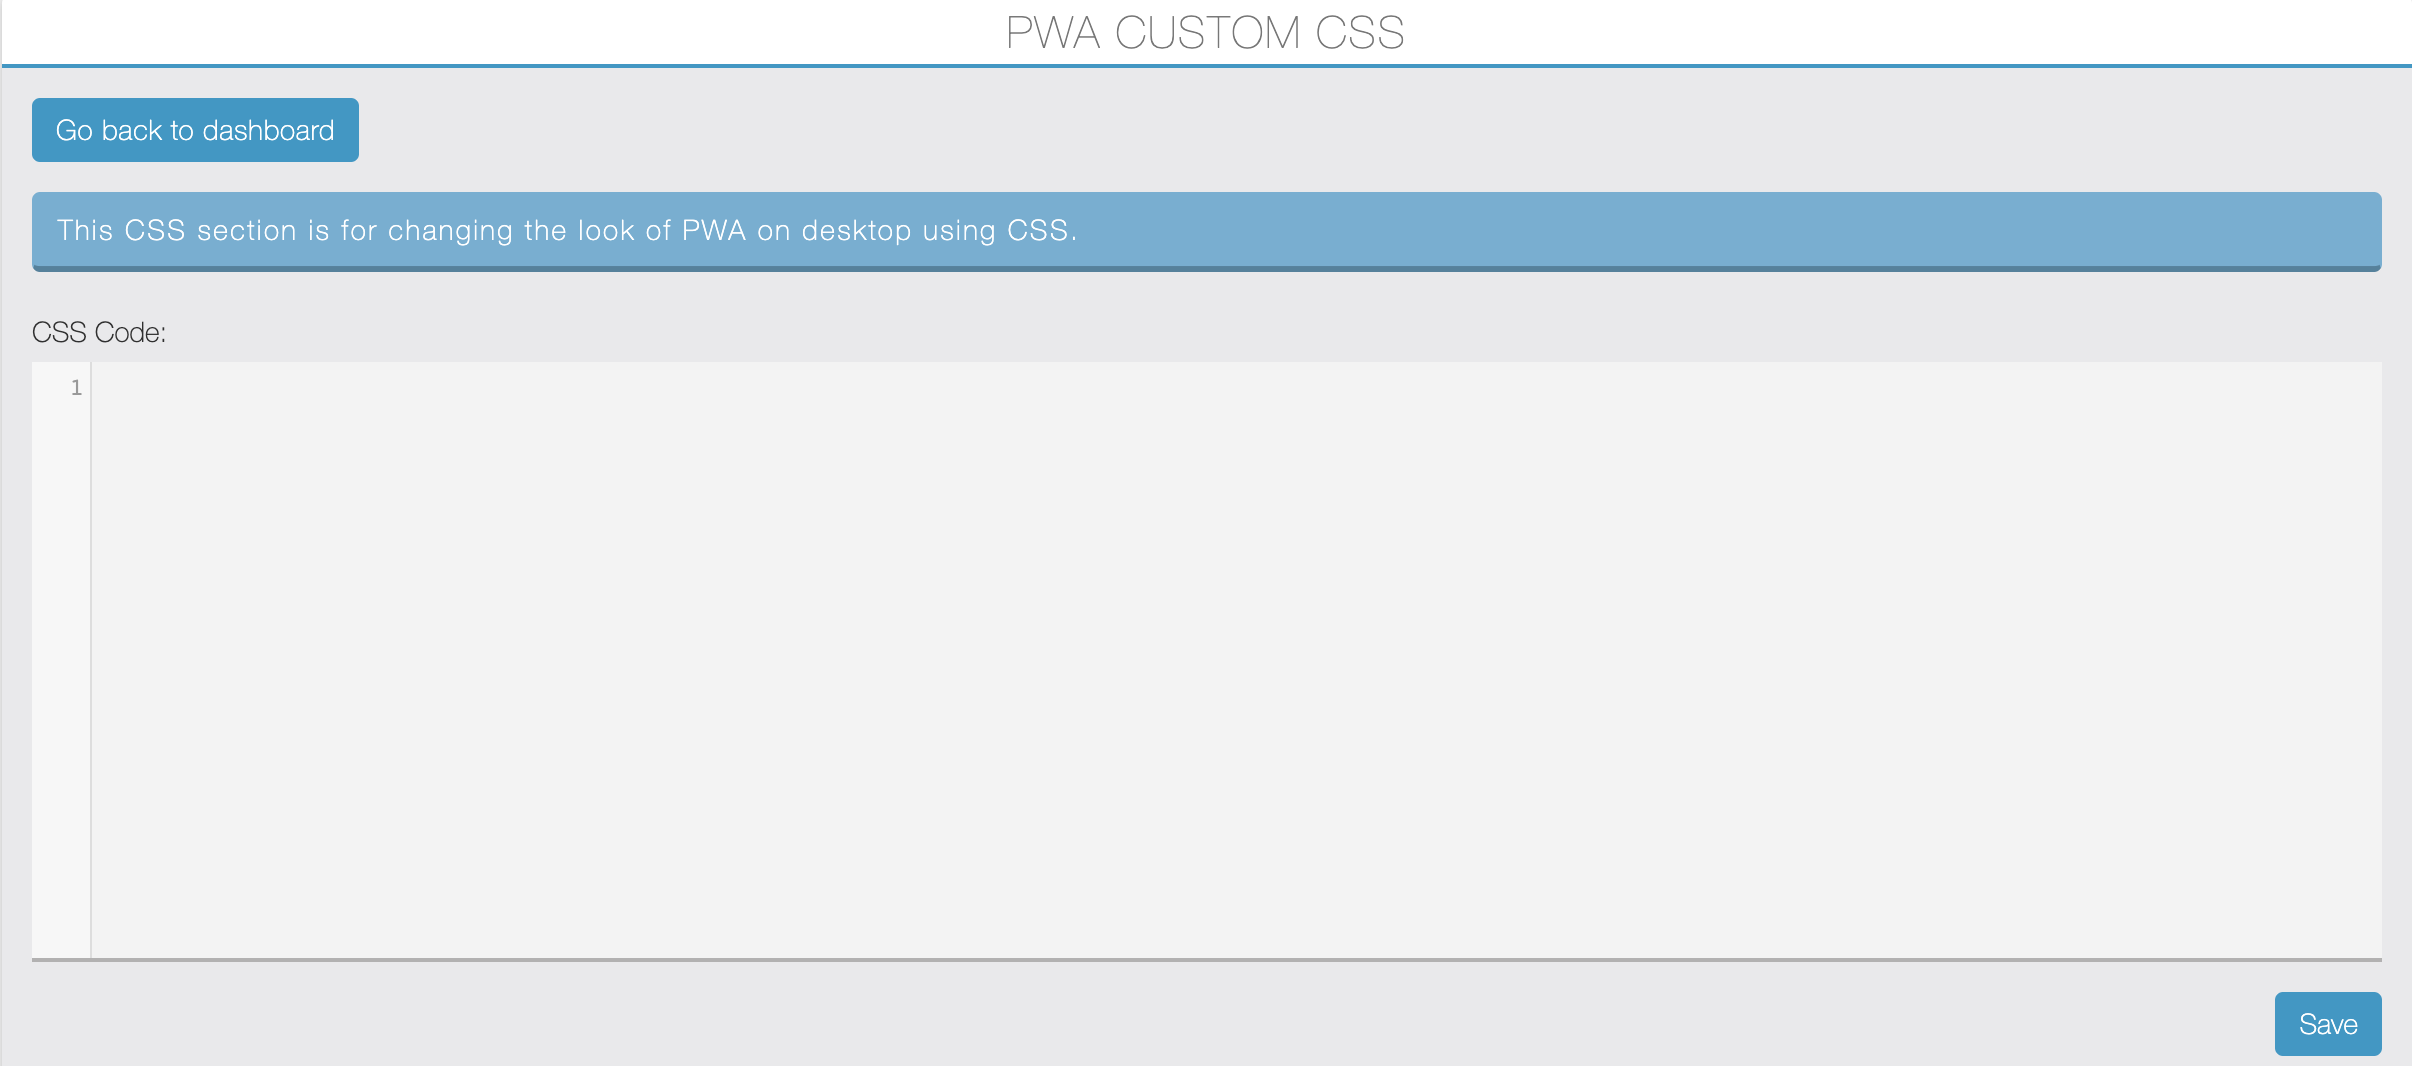
Here you can customise the look of desktop PWA using CSS. You’ll find CSS examples here.
FAQs:
When you require to regenerate / republish the PWA?
Once your PWA is published and then after you want to change PWA details like name, popup changes, enable or disable push notifications etc requires PWA regenerations.
I have installed the PWA and then after regenerated the PWA with new name or icon, so my installed PWA will display new name or icon?
No, your old installed PWA’s manifest has old data so it won’t change automatically. You have to uninstall the old PWA and reinstall the new one.
How can i set a custom domain for PWA?
You can set a custom domain from the PWA Back-office module. Refer this tutorial, After adding a custom domain, user must have to regenerate a PWA.
If you want you can restrict the access of the PWA Creator Editor Module using user roles. To do it, go to your Siberian BackOffice > Manage > Editor Access > Roles.
Now here click on the user role edit button and then from the Manage Access section uncheck the Pwa Creator and save.
Siberian PWA Creator Module Version – 3.1.0